Shower TV build
Purpose
My partner and I are almost always plugged in to YouTube, watching content ranging from beauty product reviews to sports talk shows. We're often watching at our desktop computers, laptops on the couch, phone in the kitchen, or even... in the shower.
The truth is, it's hard to watch videos in the shower. I don't want to get my phone wet, and often the iPhone speakers aren't loud enough to hear over the running water. Sure, I've used a water-resistant Bluetooth speaker before, but I was in the middle of an interview prep course and wanted to see the visual explanations on the screen.
With this bright idea, I looked to Amazon. Took me all of 5 minutes to realize that there were no commercially available shower screens! Without spending thousands on a no-name brand mirror TV, the only way to find the entry-level shower screen I was looking for was to build it myself.
Components
Since I was only ready to make a prototype, I figured that I'd have to construct this device with all consumer parts. It would be made of the following components:
- a screen, obviously
- a video source
- speakers louder than my phone
- and a battery big enough to power it all
The Screen
I had experience stripping down the plastic assembly of a PC monitor before, but knew that I had to find something thinner and lighter. Plus, I'd need something USB-powered. I've seen plenty of ads for portable USB-C monitors, and was excited to find one that had built-in speakers as well. I picked up this 12.5in 1080p display from Amazon for about $80 at the time.
The Source
I had an old Chromecast laying around and decided it would be perfect for this project. No fussing with the device itself, just turn it on and cast to it from your phone.
The Sound
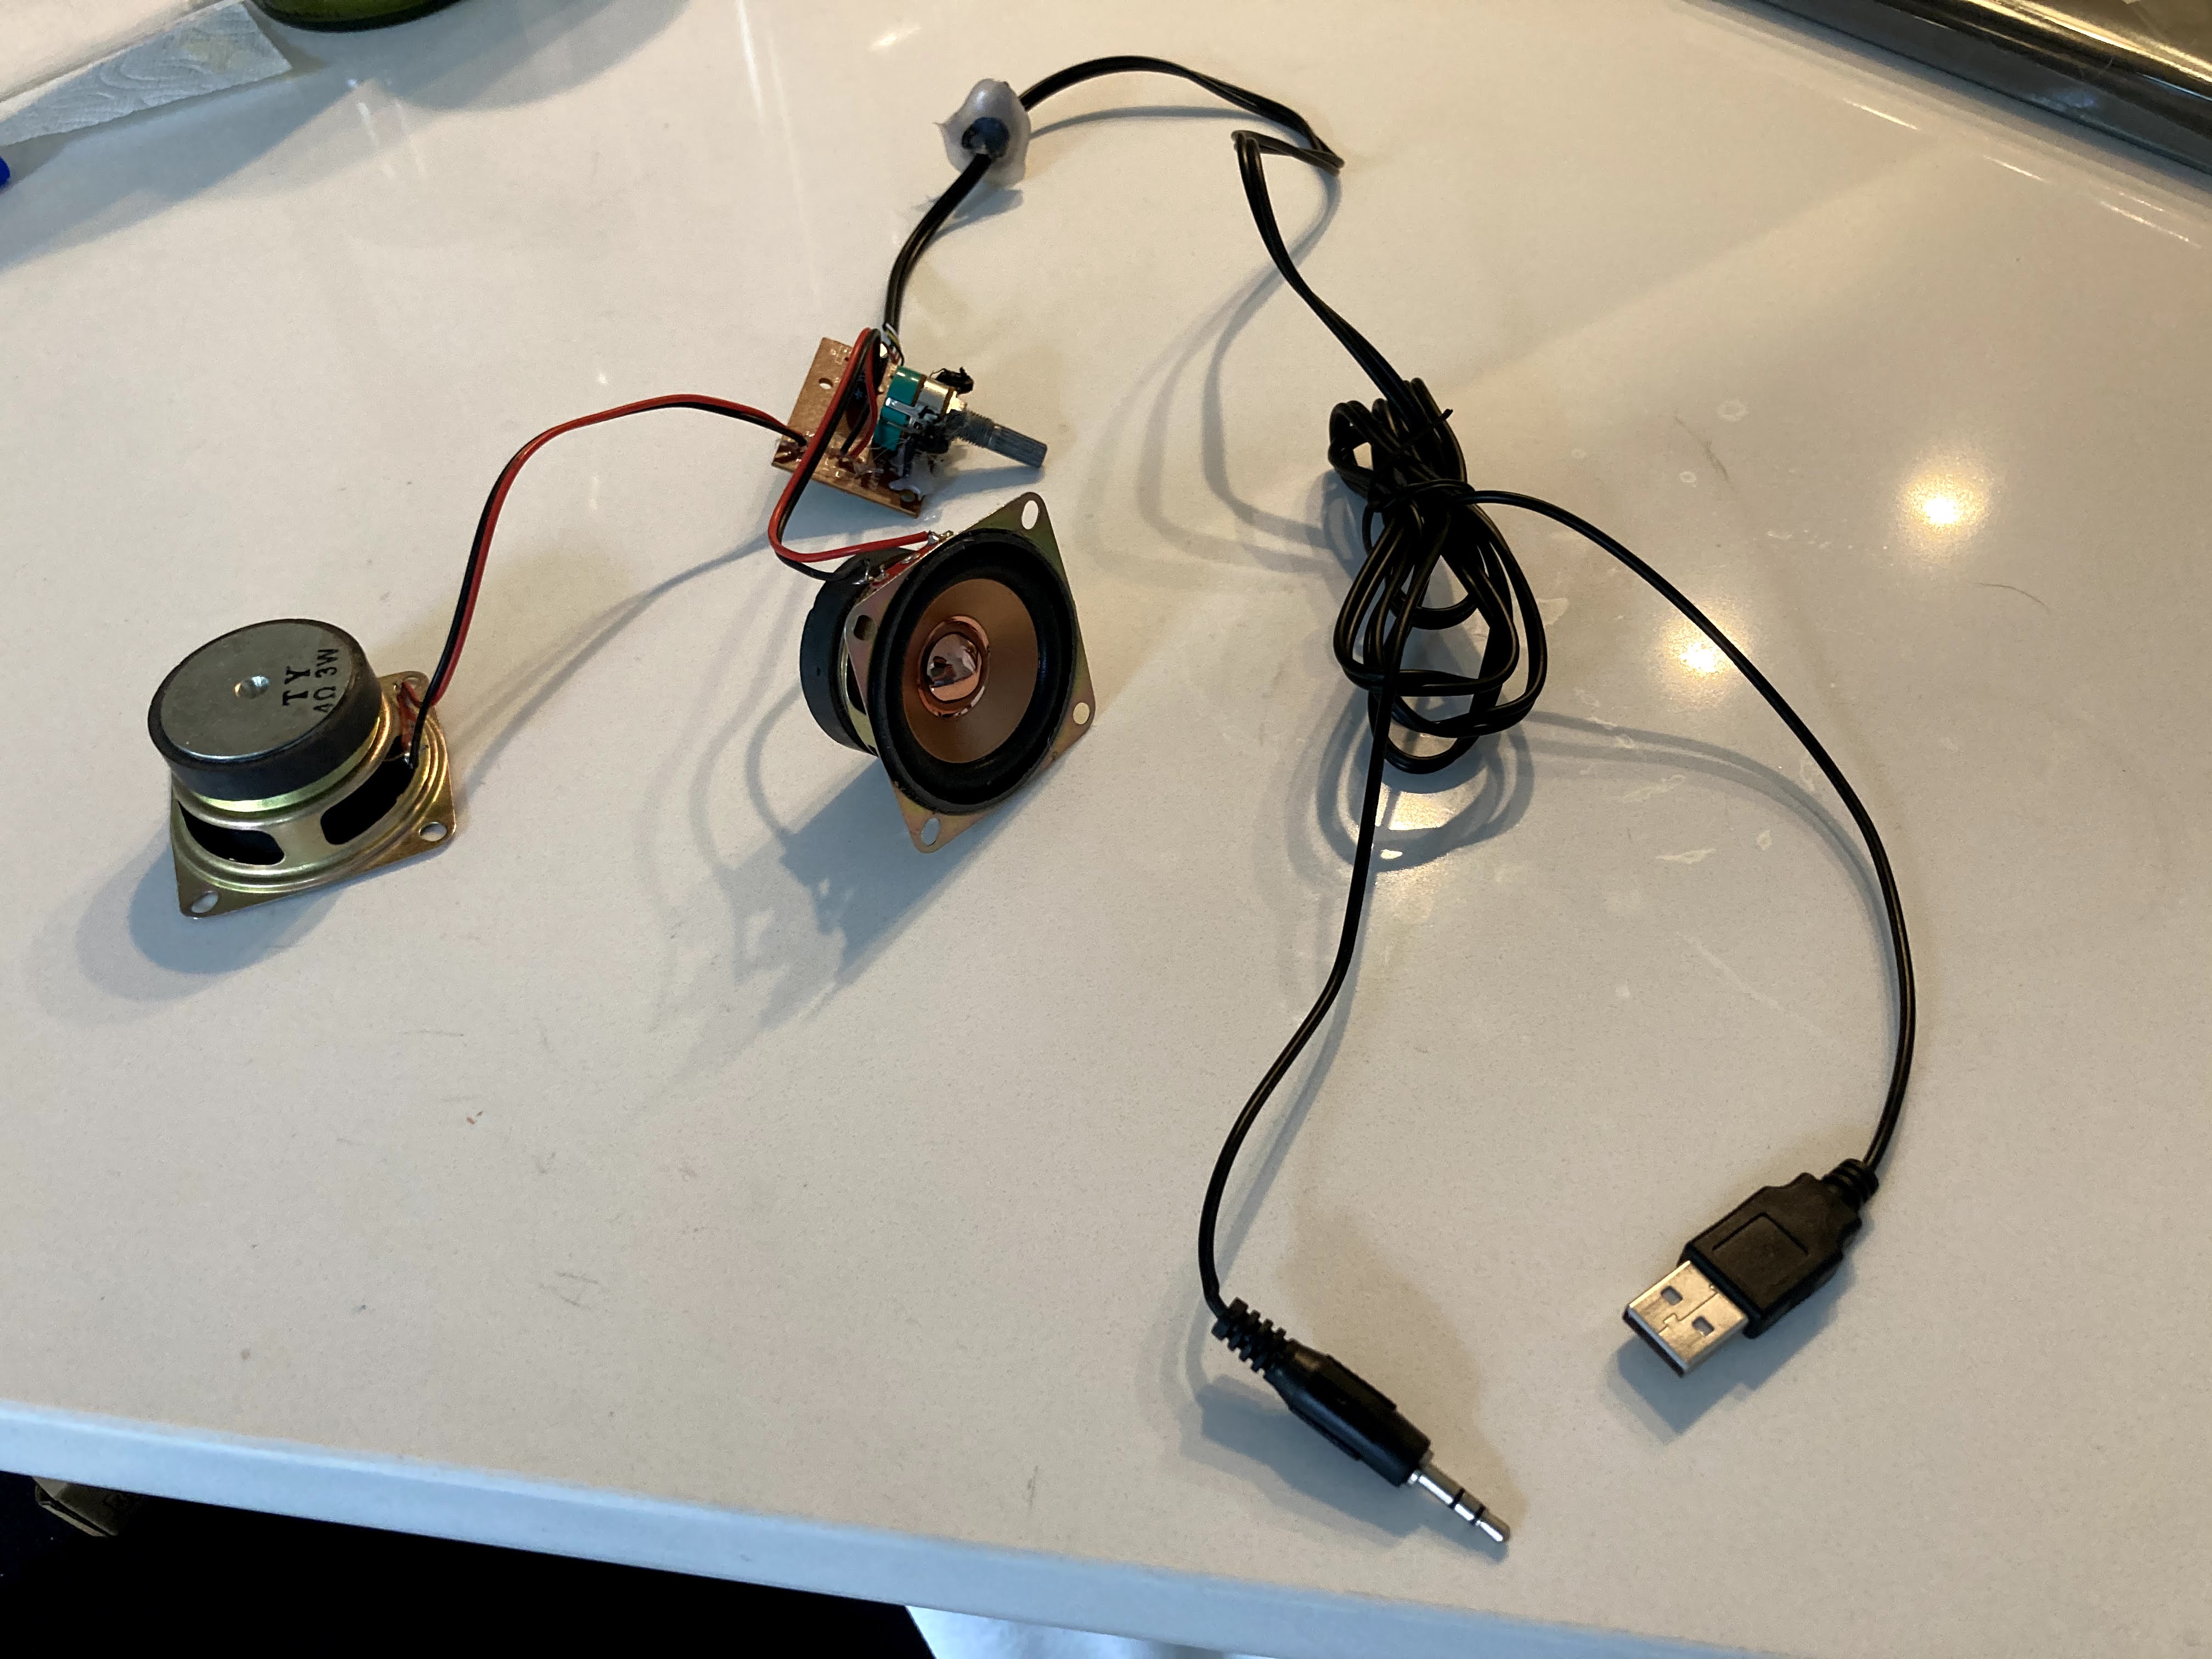
No surprise, the built-in speakers on the USB-C monitor mentioned above were terrible. Good enough for a quiet room, but not any better than phone speakers.
I had some USB-powered speakers that I had taken apart for a previous project, and they were small (but mighty) enough that they'd fit my needs. Plus, they had a dedicated volume knob!
The Juice
I had to find a battery with enough capacity to power a 1080p60 screen and Chromecast simultaneously. A 20000mAh portable battery would have enough juice to power the setup for at least a few hours, but realistically I'd only be using it for 10-30 minutes at a time.
I already owned a nice Anker battery, but I realized it had a major flaw: no true on/off button. The battery would only output power when it detected that something was plugged in, which in this case, would be all the time.
I found this battery on Amazon for a cheap price and it checked all the boxes. Large capacity, USB-C input, 2 USB-A output, and I determined from the reviews that the battery can be turned on/off without having to unplug. Perfect.
Fitting them all together
With enough adapters, anything is possible.
The battery pack I chose only had two USB-A outputs. With my addition of the speakers, that brought the count to 3 total powered devices.
I noticed that the portable monitor had two USB-C ports: one full-function (data&power) and one just for power. Much to my surprise, it turns out that these ports can output as well.
The monitor and the Chromecast would be powered directly by the battery, and with a USB-C to USB-A adapter, the monitor would power the speakers.
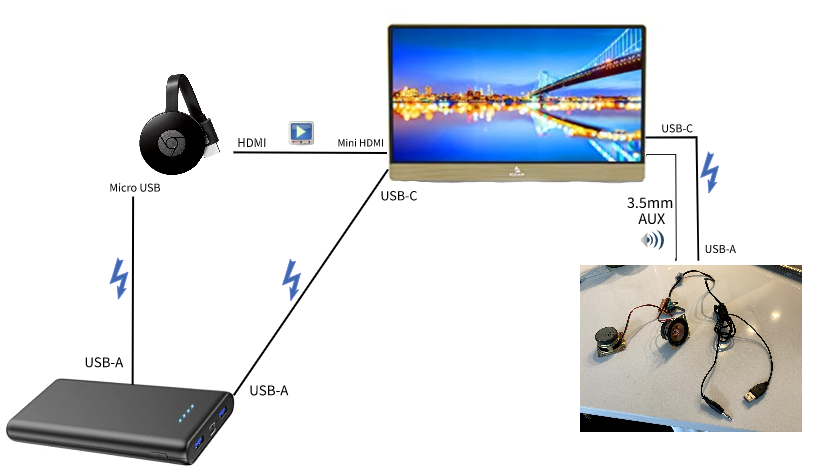
Count 'em, there are at least five odd adapters in the mix:
- Male USB-C → female USB-C for charging the battery
- 90º Male Mini HDMI → female HDMI for Chromecast
- 270º Male USB-C → female USB-A for speaker power
- 90º male → female 3.5mm AUX
- Right-angle USB-C to right-angle USB-A
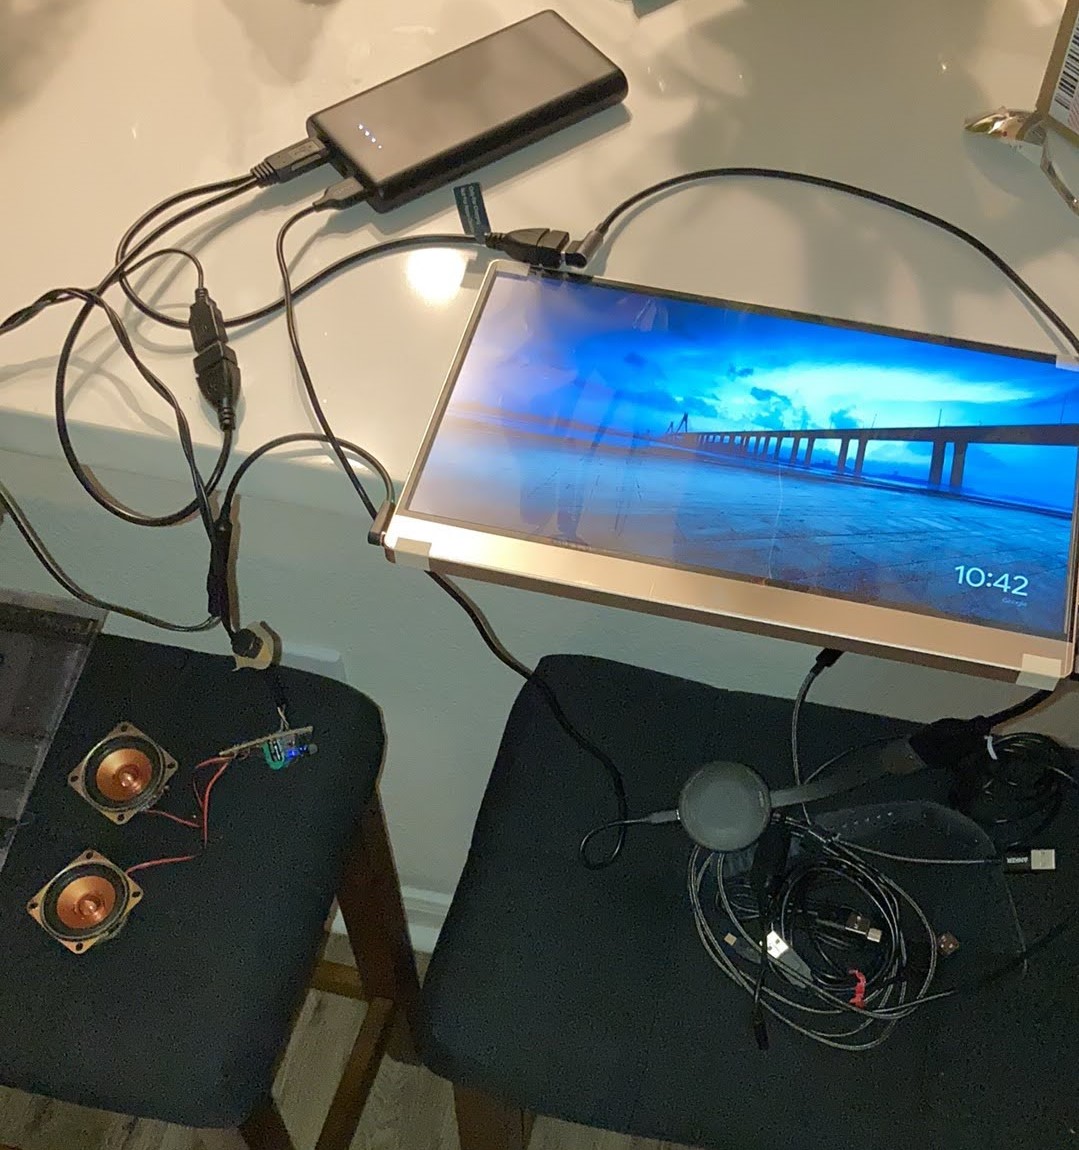
Test-fitting was... a messy endeavor.
Assembly
The best idea I could think of for something clear, strong, and waterproof was sheet acrylic. I went to Home Depot to take a look at a few kinds and settled on about 0.1in thick sheets.
I cut out the pieces to form a box with just enough space to fit the components inside.
The box also needed a few holes:
- small hole for the power button
- oval-shaped hole for the female USB-C charging port
- small hole at bottom for volume knob
- grates at bottom for speaker output
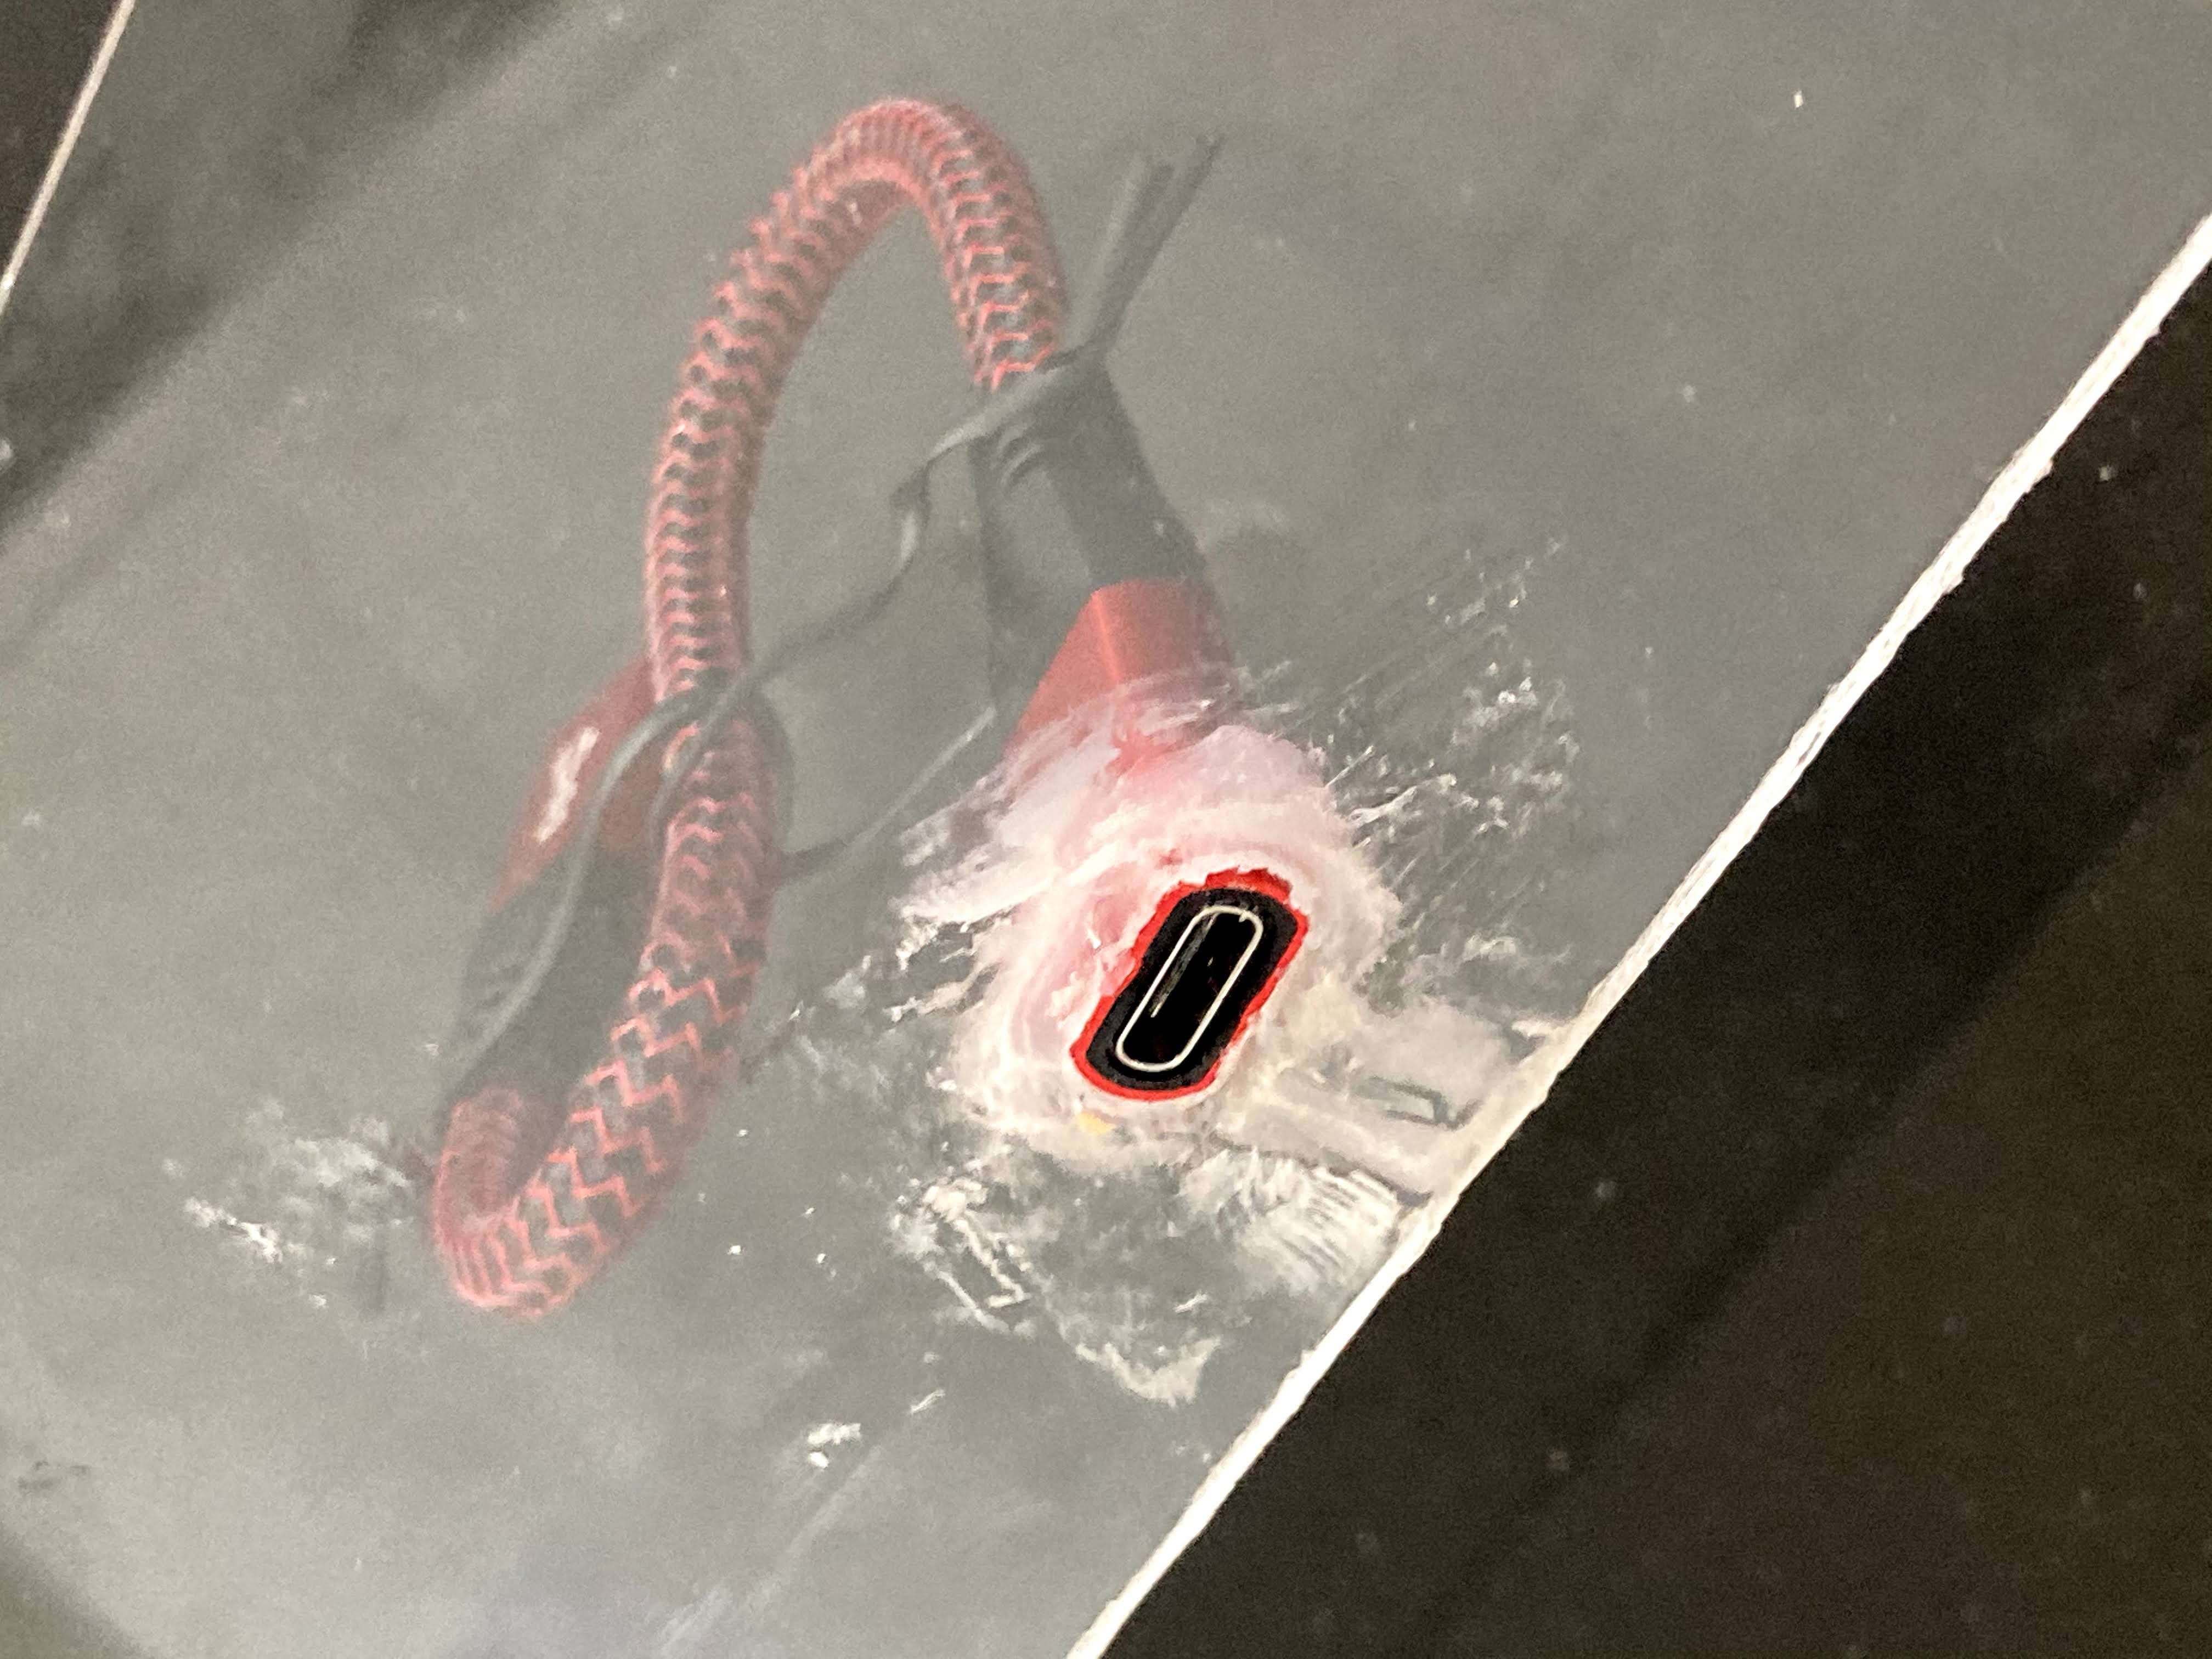 hole in side of the box for charging the battery
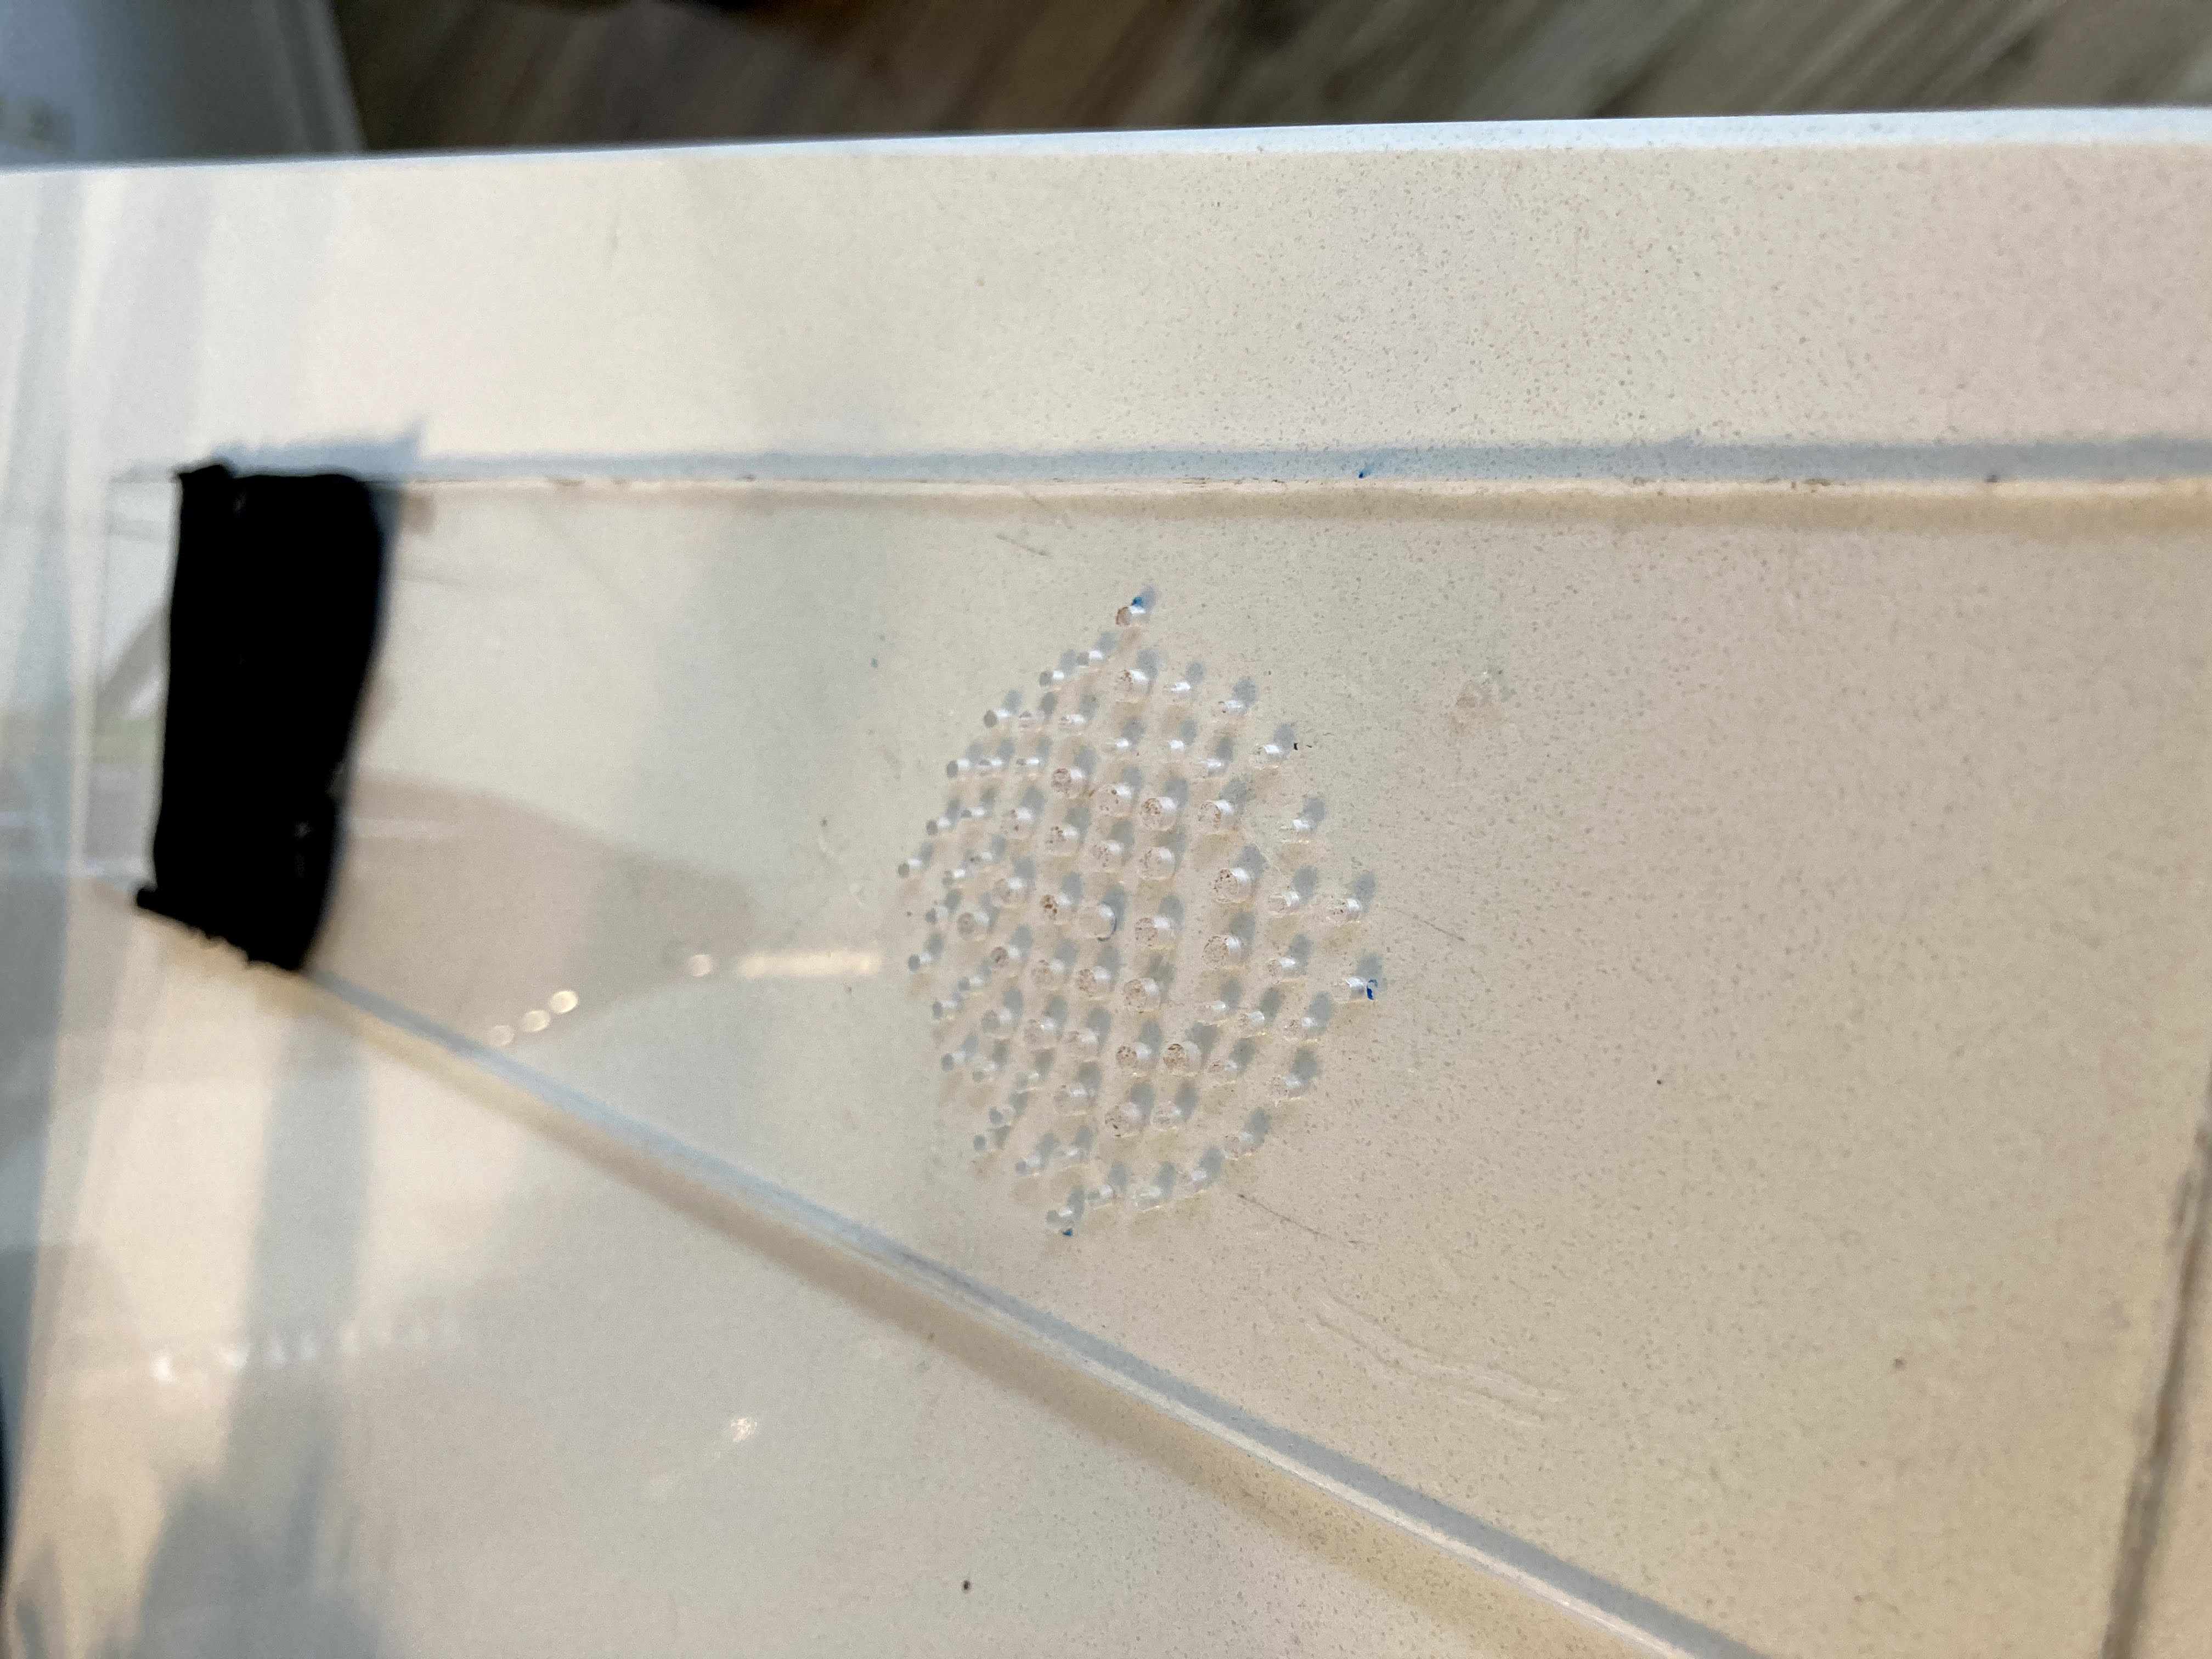 drilled a grid of tiny holes for each speaker to sit behind. also using water-resistant treated fabric on the insides
I learned throughout this assembly process that superglue deserves it's own special place in hell.
An article online told me that acrylic is incredibly receptive to adhesive bonding, and the bond strength can actually exceed the strength of the acrylic itself. One of the adhesives mentioned the most was superglue, and I sure own a lot of superglue. What could go wrong?
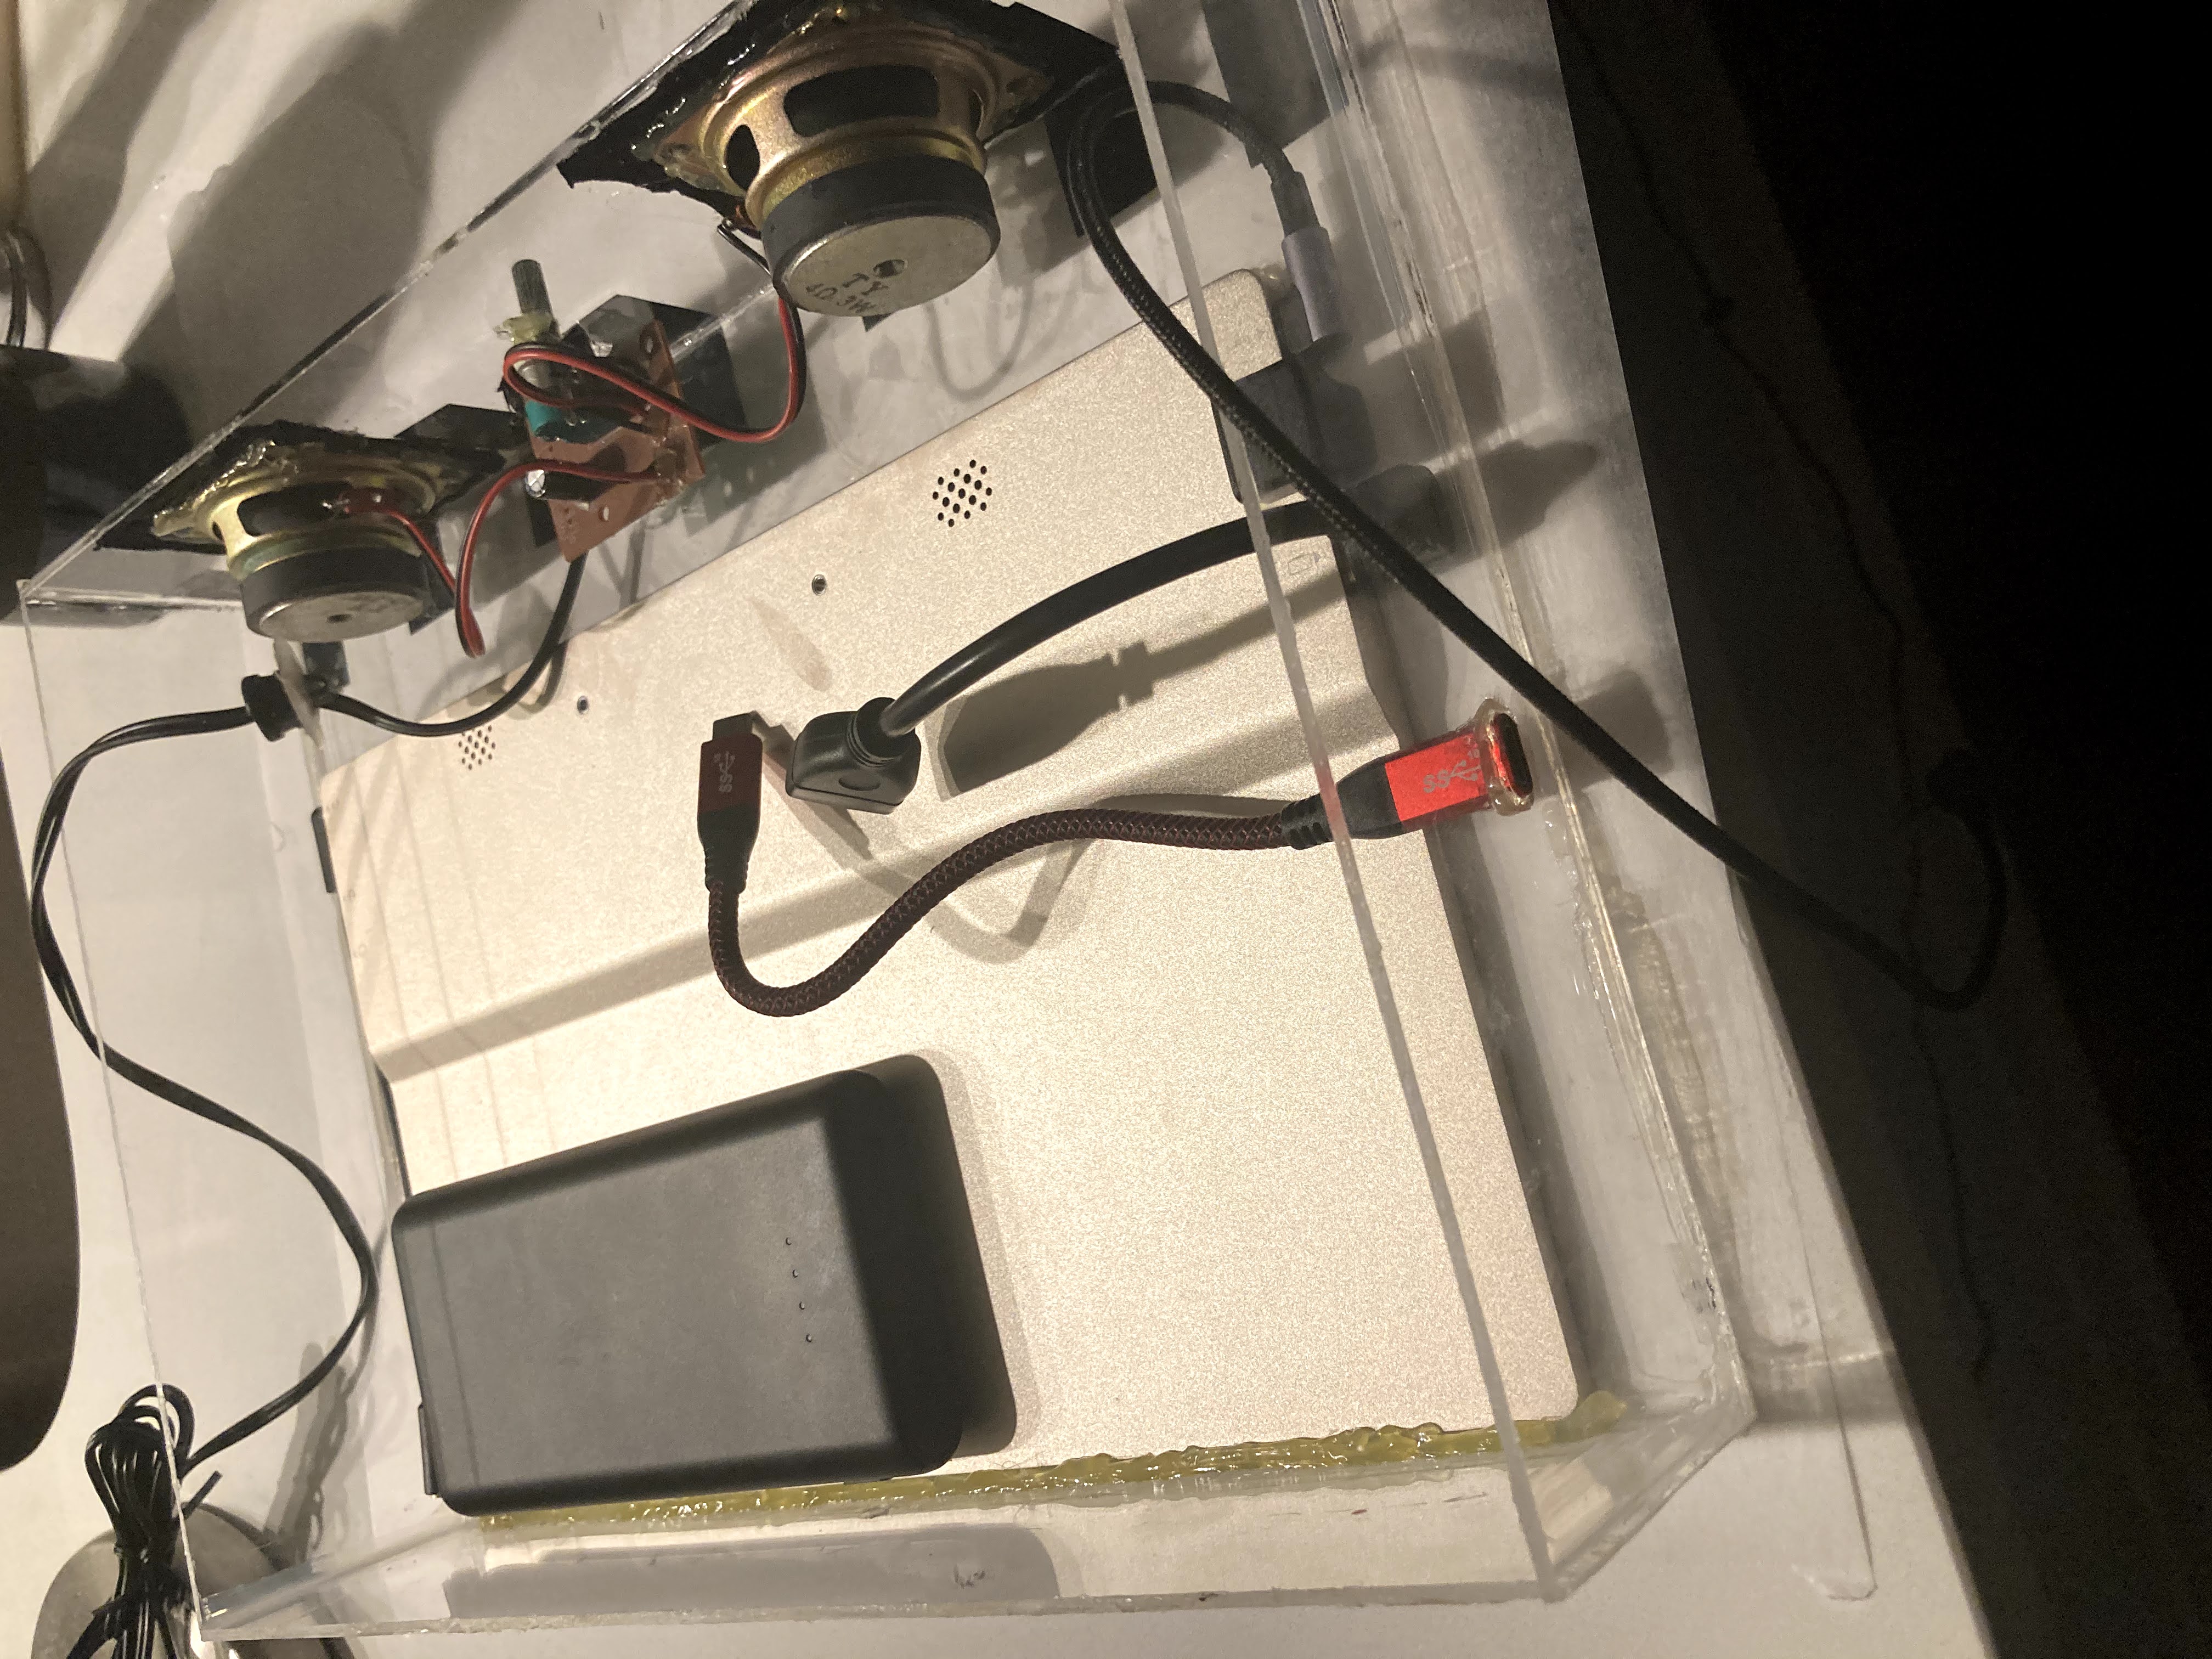
Superglue was very impressive. All of the right-angle joints I adhered were very strong and cured within minutes. With all side panels but one in place, I was able to lay out and secure all of the internal components. The monitor itself was hot-glued to the front panel to keep it in place, and the battery pack and Chromecast were hot-glued to the back of the monitor housing. With the speaker housings hot-glued to the bottom panel, everything was secured and wired together.
Time to glue on the last panel.

Shit.
Turns out that superglue vapors, without ventiliation, will leave some pretty nasty discoloration on acrylic. Luckily, the hot glue seal I formed between the front acrylic and monitor screen to prevent moisture also prevented any discoloration in front of the screen. Just got some cool battle scars around the rest of the assembly, no big deal.
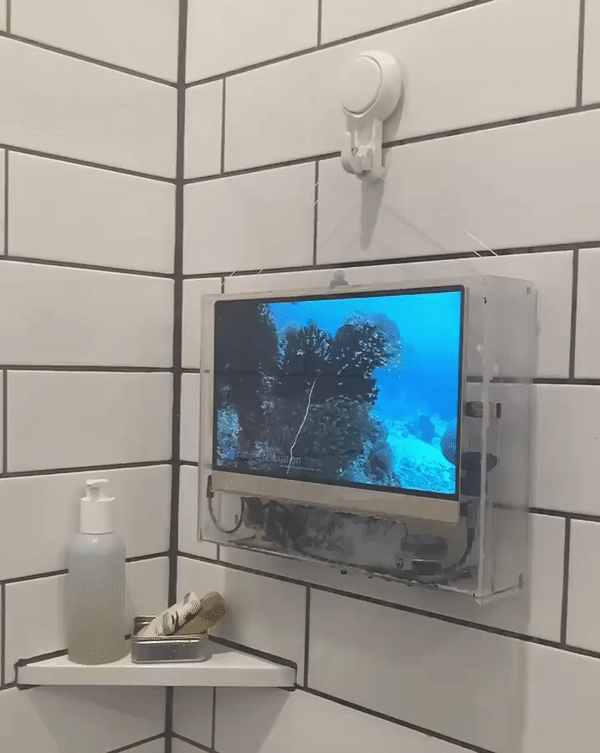
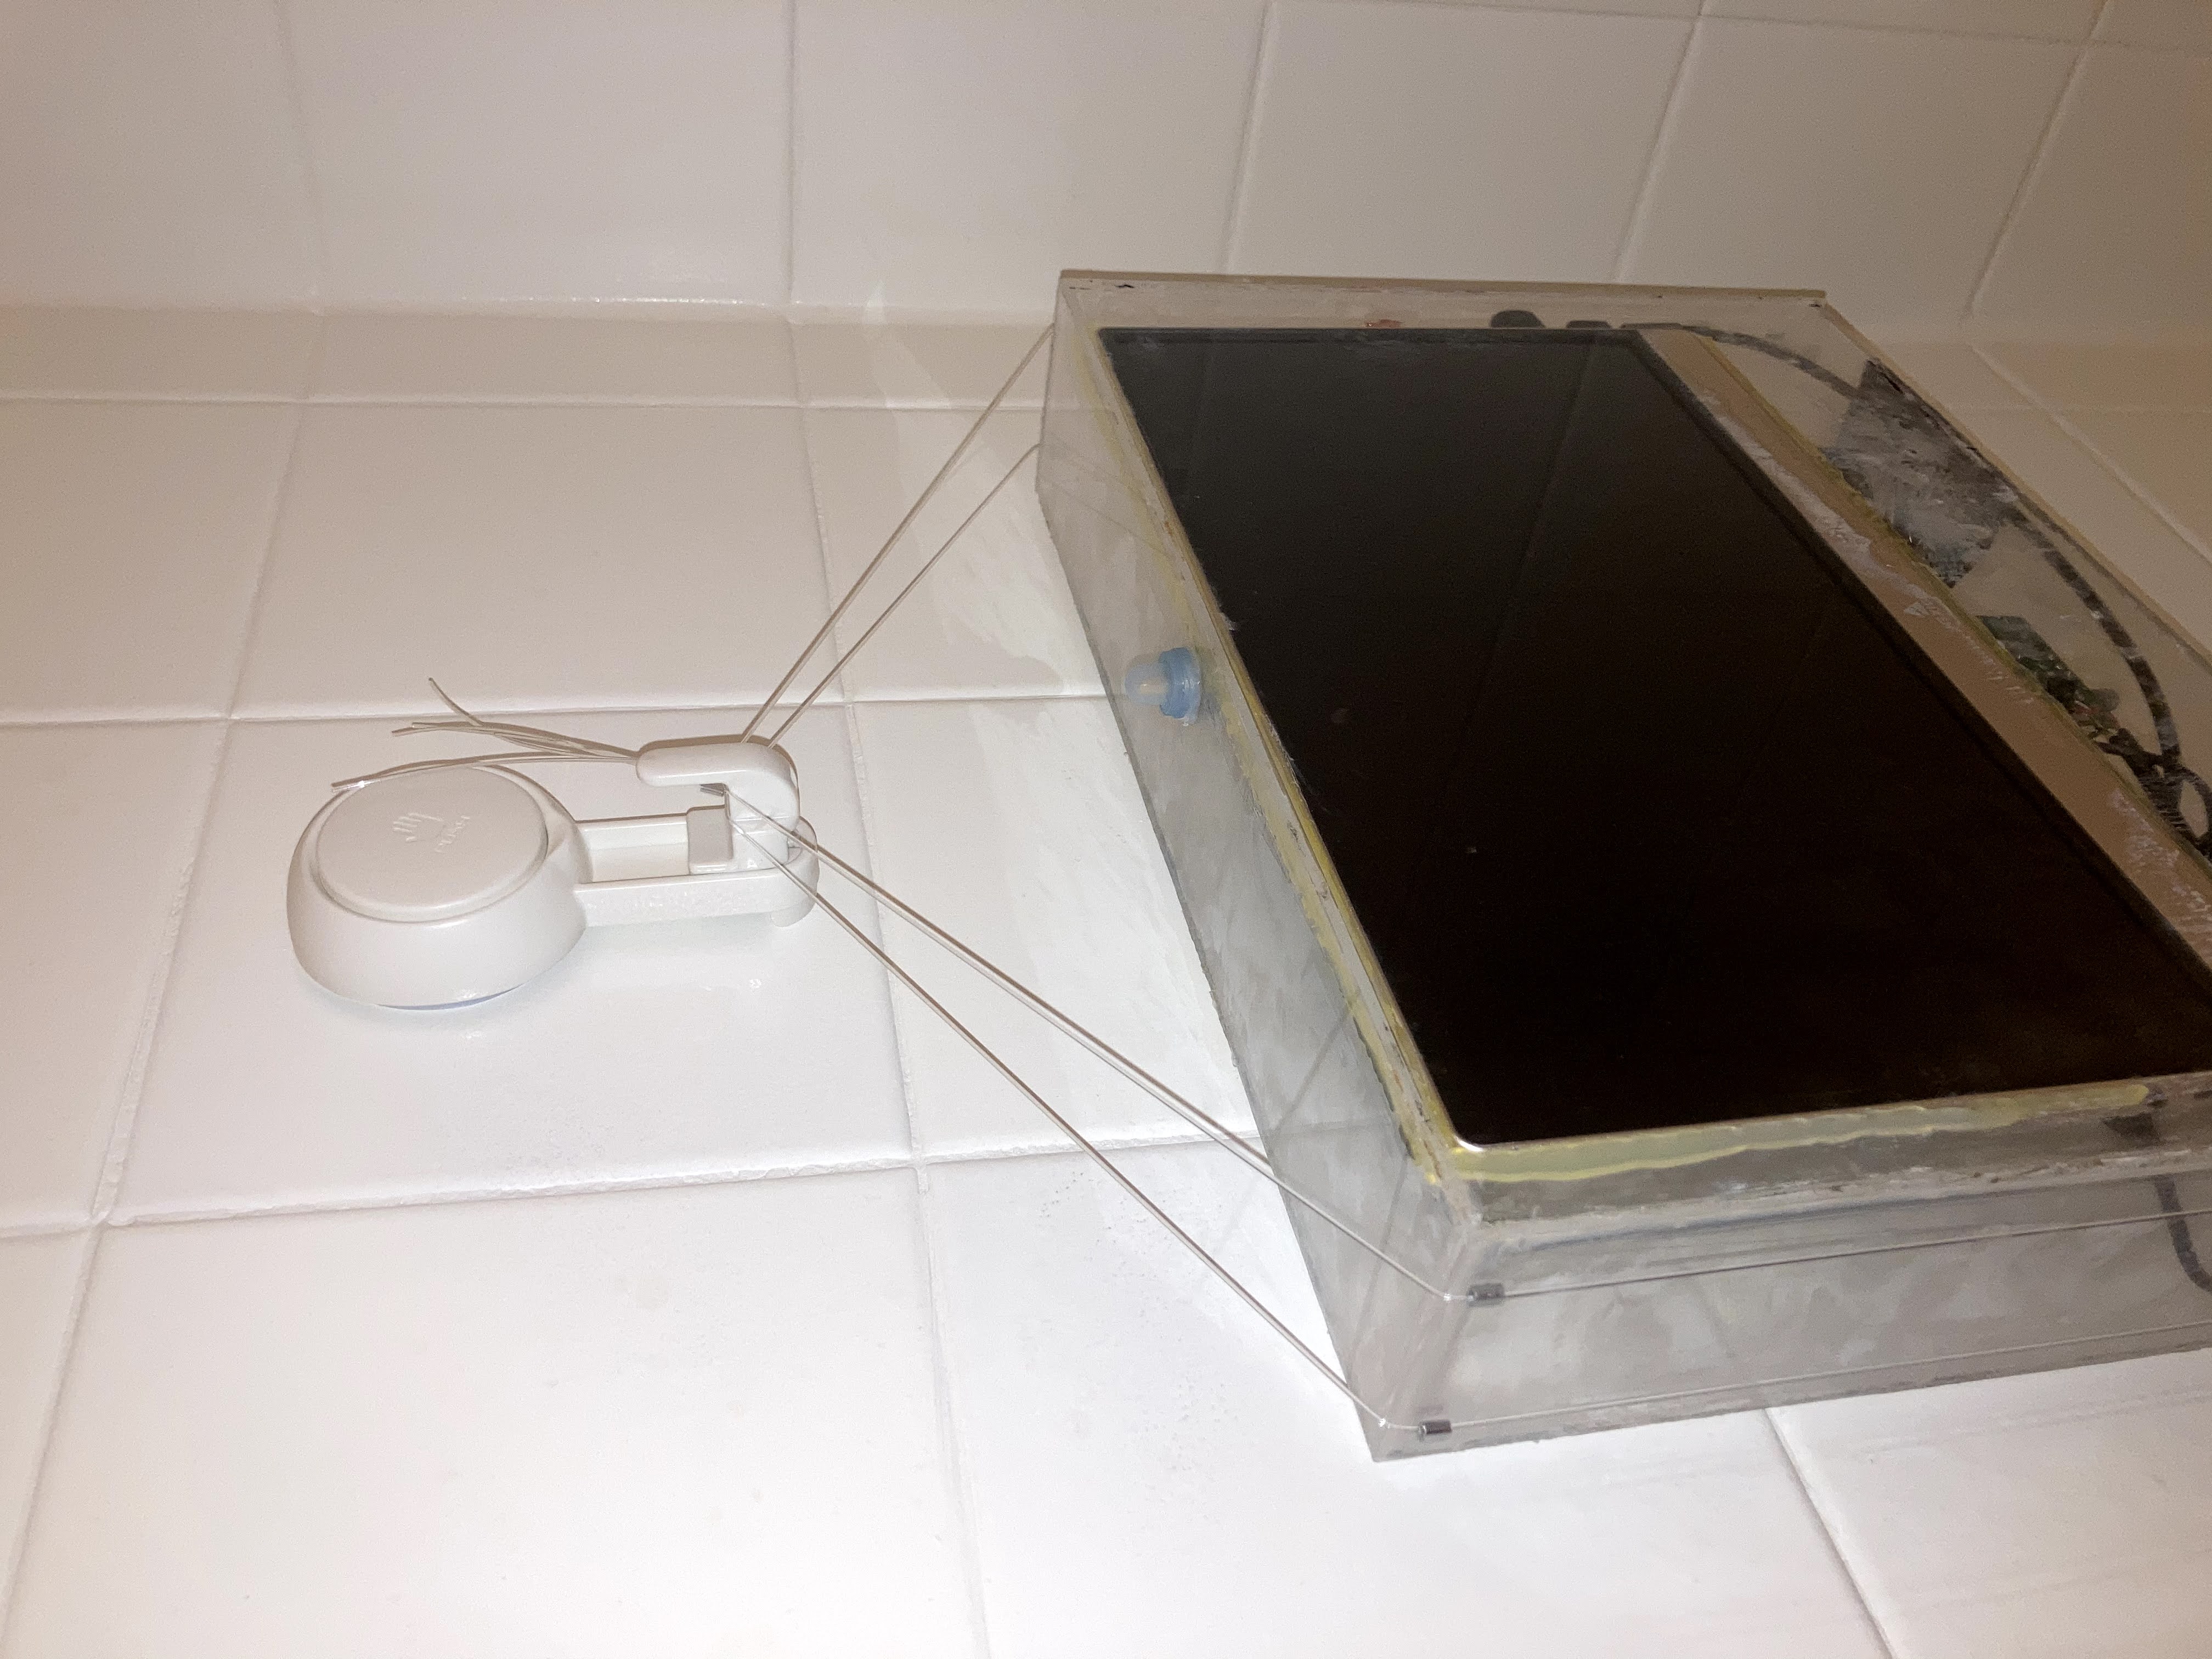
I used some heavy duty suction cups and nylon wire to hang the box inside my shower.
Final thoughts
Looking back on my original inspiration for this project, I was motivated most by the fact that I couldn't find any commercially available solution. I'm often searching for my way into the consumer tech industry, and hope to make a lot of improvements to a future prototype.
A few musings:
- I searched for weeks looking to find a way to cast videos to the device without a consumer product (Chromecast, Fire stick, etc.) and learned about DIAL (Discovery and Launch). This protocol may help if I ever create my own software implementation.
- This project was the first time I was ever inspired to use SoC's and integrated circuits for peripherals like buttons or volume knobs. Before I get to any of that, there's a lot I have to learn.
- Using commercial components (not meant for consumers) would help a lot in bringing down the cost, size, and weight of any future prototypes.
My lovely little prototype has now survived at least a hundred showers and countless recharges! Did I mention that the battery lasts over a week at a time? Probably 4-5 hours of actual runtime before it gives out. Even for a first attempt, I'm incredibly pleased with the results.
© Jack Meyer.RSS